Having a loose kitchen faucet can be annoying. It can cause leaks or make noise. Luckily, tightening a single hole kitchen faucet is easy. You can do it yourself without calling a plumber. In this article, we will guide you through the steps. Let’s make your kitchen faucet work better!
What You Need
Before you start, gather your tools. You will need:
- A wrench or pliers
- A screwdriver (flathead or Phillips)
- A towel or rag
Having these items ready will help you complete the job quickly.
Step 1: Turn Off the Water Supply
Before working on your faucet, turn off the water supply. This step is important. It helps prevent spills. Find the shut-off valves under your sink. Turn them clockwise to close. If you can’t find them, turn off the main water supply for your home.
Step 2: Clear the Area
Next, clear the area around your sink. Remove any items from the countertop. This includes soap, sponges, and dishes. You want to have enough space to work. Use a towel to wipe any water around the faucet. This will help keep the area dry and safe.
Credit: www.signaturehardware.com
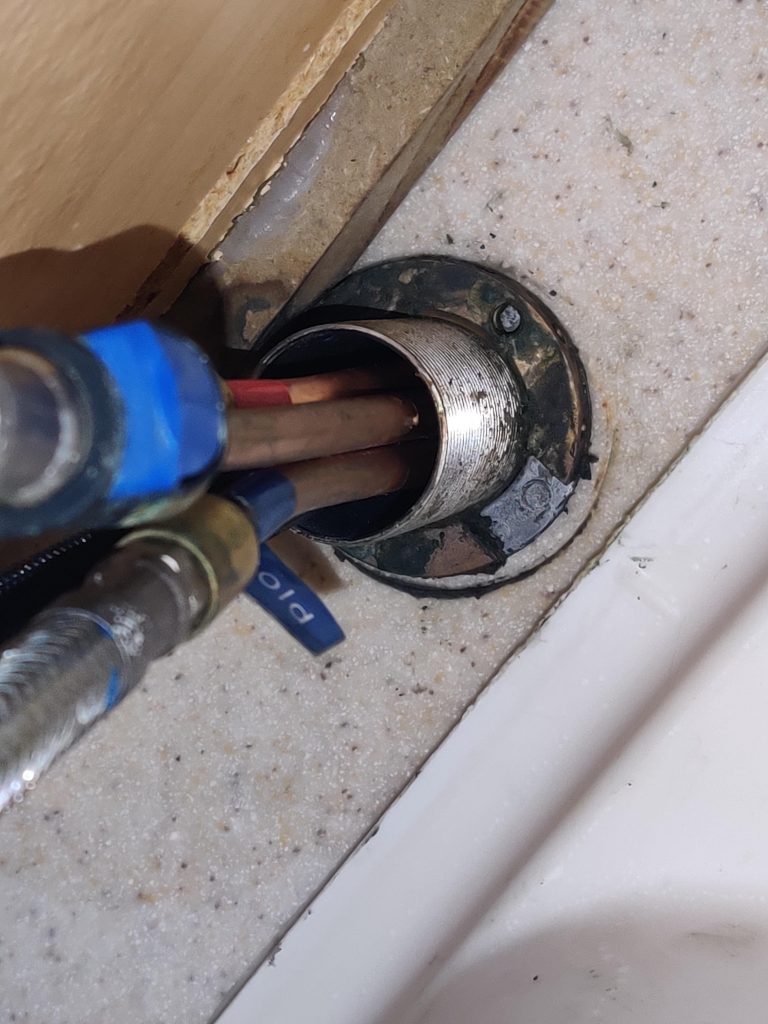
Step 3: Inspect the Faucet
Now, look closely at your faucet. Check for any loose parts. There are usually nuts and screws holding the faucet in place. If you see any, they may need tightening. Look for the mounting nut under the sink. This is the part that holds the faucet to the sink.
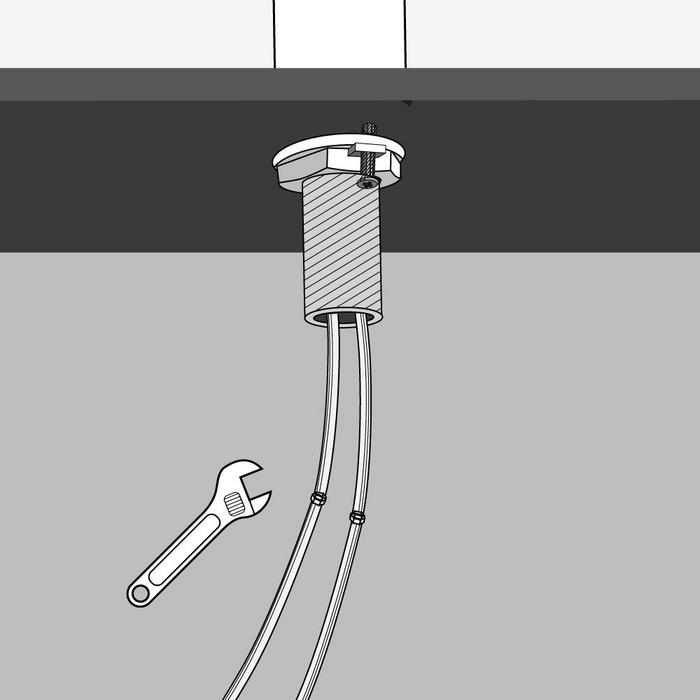
Step 4: Tighten the Mounting Nut
To tighten the mounting nut, use your wrench or pliers. Carefully grip the nut. Turn it clockwise to tighten. Do not over-tighten. This can break the nut or the faucet. If you feel resistance, stop turning.

Credit: diy.stackexchange.com
Step 5: Tighten the Faucet Handle
Next, check the faucet handle. Sometimes, it becomes loose too. Locate the screw on the handle. Use your screwdriver to tighten it. Turn the screw clockwise until it feels snug. Again, be careful not to over-tighten.
Step 6: Check the Faucet Spout
After tightening the handle, check the spout. Sometimes the spout can also become loose. Look for screws underneath the spout. If you find any, use the screwdriver to tighten them. Make sure it is secure but not too tight.
Step 7: Turn On the Water Supply
Once everything is tightened, it’s time to turn on the water. Go back to the shut-off valves under the sink. Turn them counterclockwise to open. If you turned off the main water supply, turn that back on too.
Step 8: Test the Faucet
Now it’s time to test your faucet. Turn on the faucet and check for leaks. Look under the sink to see if any water is dripping. If you see any leaks, you may need to tighten more. If everything is dry, you did a great job!
Common Problems and Solutions
Sometimes, you may face issues when tightening your faucet. Here are some common problems and their solutions:
| Problem | Solution |
|---|---|
| Faucet is still loose | Check all nuts and screws again. |
| Water still leaks | Make sure the rubber washers are not damaged. |
| Screws are rusted | Use a rust remover or replace the screws. |
Regular Maintenance Tips
To keep your faucet in good shape, follow these tips:
- Check for leaks every few months.
- Clean the faucet regularly to remove dirt.
- Replace worn-out parts quickly.
By following these tips, you can avoid problems in the future. A little maintenance goes a long way.
Frequently Asked Questions
How Can I Tighten My Single Hole Kitchen Faucet?
To tighten your single hole kitchen faucet, use a wrench or pliers. Turn the nuts under the sink clockwise.
What Tools Do I Need To Tighten A Faucet?
You will need a basin wrench or adjustable pliers. A towel can help catch any water.
Why Is My Faucet Leaking?
A faucet may leak due to loose connections or worn-out washers. Tightening the nuts often fixes the issue.
How Often Should I Check My Faucet?
Check your faucet every few months. This helps catch leaks or loose parts early.
Conclusion
Tightening a single hole kitchen faucet is easy. You can do it in just a few steps. Remember to turn off the water supply first. Use the right tools and be careful not to over-tighten. With these simple steps, your faucet will work better. You can save money and time by doing it yourself.
Now that you know how to tighten your faucet, you can keep your kitchen in great shape. If you follow these steps, you will be successful. Enjoy your tight and leak-free faucet!