Are you planning to remove your kitchen sink faucet? This task is simple. You can do it yourself. Let’s go through the steps together. Follow these steps carefully. You will need some tools and patience.

Credit: www.youtube.com
Tools You Will Need
- Adjustable wrench
- Flathead screwdriver
- Phillips screwdriver
- Pliers
- Bucket
- Old towels or rags
- Flashlight (optional)
Preparation Steps
Before you start, prepare your workspace. Here are some steps:
- Clear the area under the sink.
- Remove any items from the countertop.
- Turn off the water supply. Look for valves under the sink.
- Place a bucket under the sink. This will catch any water.
- Use old towels to wipe up spills.
Disconnecting the Water Supply
Now, let’s disconnect the water supply. Follow these steps:
- Locate the water supply valves. They are usually under the sink.
- Turn the valves clockwise to shut off the water.
- Use the adjustable wrench to loosen the nuts. These connect the hoses to the faucet.
- Once loose, carefully remove the hoses. Let any water drain into the bucket.
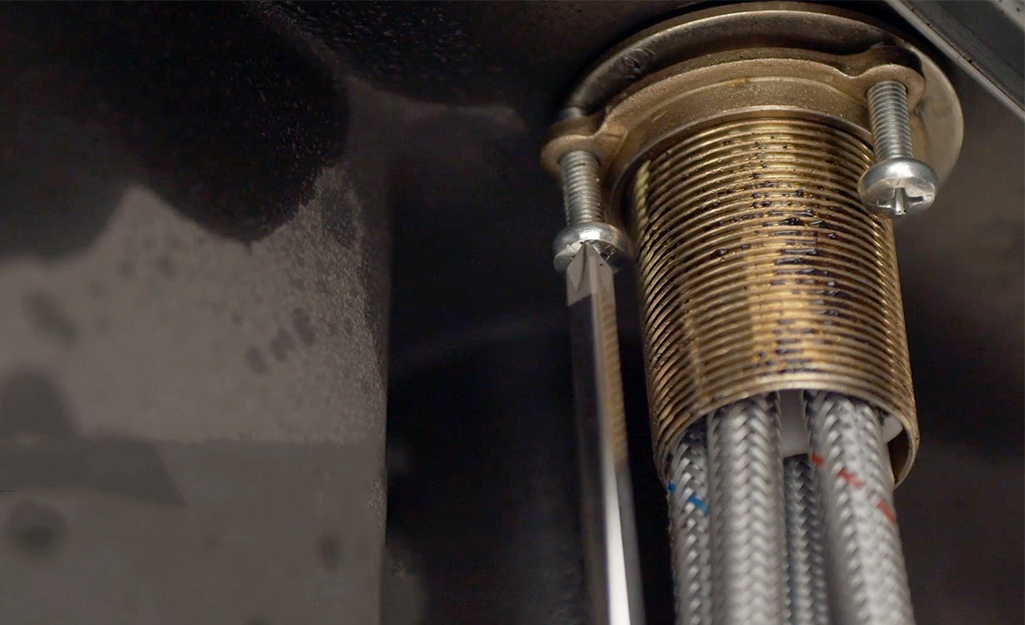
Removing the Faucet
Now, it is time to remove the faucet itself. Follow these steps:
- Look under the sink. Find the mounting nuts. These hold the faucet in place.
- Use the adjustable wrench to loosen the nuts. Turn them counterclockwise.
- Once loose, remove the nuts by hand.
- Gently lift the faucet out from the top. Be careful not to damage the sink.
Cleaning the Area
After removing the faucet, clean the area. Here’s how:
- Wipe down the sink and countertop.
- Remove any old putty or debris.
- Check for any leaks or damages. Fix any problems before installing a new faucet.
Tips for a Smooth Process
Here are some tips to help you:
- Keep all your tools nearby. It saves time.
- Take pictures of your faucet connections. This helps during reinstallation.
- Label the hoses if needed. This will make it easier later.
- Work slowly and carefully. Rushing can cause mistakes.

Credit: diy.stackexchange.com
What to Do if You Get Stuck
Sometimes, things do not go as planned. Here’s what to do:
- If the nuts are too tight, use penetrating oil. Let it sit for a few minutes.
- If you cannot reach a part, use a flashlight. It helps you see better.
- If you break a part, do not panic. You can buy replacements.
- Ask a friend for help if needed. Sometimes two people are better.
Frequently Asked Questions
How Do I Remove My Kitchen Sink Faucet?
To remove your kitchen sink faucet, start by turning off the water supply. Then, disconnect the water lines and unscrew the mounting nuts.
What Tools Do I Need To Remove A Faucet?
You will need an adjustable wrench, a basin wrench, and a screwdriver. These tools help in loosening and removing the faucet.
Is It Hard To Remove A Kitchen Faucet?
Removing a kitchen faucet is manageable for most people. With the right tools and steps, it can be done easily.
Can I Remove A Faucet Without Professional Help?
Yes, you can remove a faucet yourself. Follow clear instructions, and take your time to avoid mistakes.
Conclusion
Removing a kitchen sink faucet is easy. You can do it by following these steps. Gather your tools. Prepare your area. Disconnect the water supply. Remove the faucet. Clean the sink afterward. If you face any issues, take your time. Remember, practice makes perfect. Soon, you will be a pro at this. Happy plumbing!