Installing wall cabinets in your kitchen can be a fun project. It can also make your kitchen look better. Wall cabinets give you extra storage space. This guide will help you do it step by step. You will need some tools and materials to start.
Tools You Will Need
Before you start, gather the right tools. Here is a list:
- Drill
- Screwdriver
- Level
- Stud finder
- Measuring tape
- Pencil
- Clamps
Materials Required
Now, let’s list the materials you need:
- Wall cabinets
- Screws
- Wood shims
- Brackets (if needed)

Credit: www.mrgutterlimited.com
Planning Your Cabinet Layout
Before you begin, plan where you want the cabinets. Think about the kitchen layout. Take measurements of the wall space. Mark the spots on the wall with a pencil. Make sure to leave space for the countertop and appliances.
Finding the Right Height
Most wall cabinets sit about 18 inches above the countertop. This height works well for most kitchens. Measure from the floor to the bottom of the cabinet. Use a level to draw a straight line on the wall. This line shows where the bottom of the cabinet will go.
Finding Studs in the Wall
Studs are the wooden beams in your wall. You need to find them. Use a stud finder to locate the studs. Mark the locations with a pencil. This is where you will screw in the cabinets. If you cannot find a stud, use wall anchors.
Preparing the Cabinets
Before hanging the cabinets, prepare them. Remove doors if needed. This makes them lighter and easier to install. Lay the cabinets on a flat surface. Check for any damage. Make sure everything is in good condition.
Hanging the First Cabinet
Now, it’s time to hang the first cabinet. Here are the steps:
- Lift the cabinet and align it with the line you drew.
- Check that the cabinet is level.
- Once level, use clamps to hold it in place.
- Drill screws into the studs to attach the cabinet.
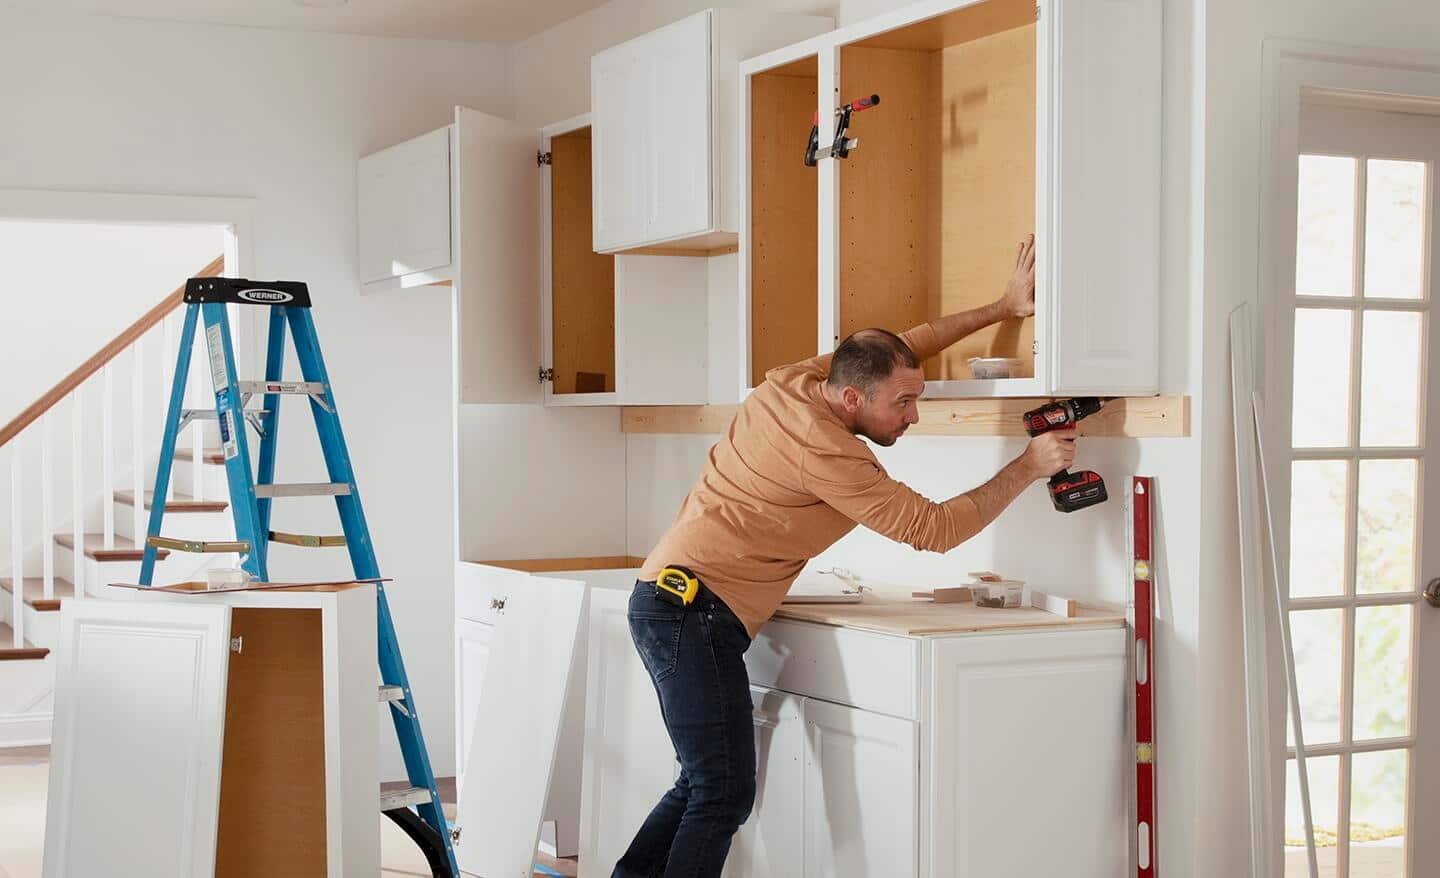
Credit: www.homedepot.com
Hanging Additional Cabinets
Once the first cabinet is up, it is time for more. Hang the next cabinet next to the first one. Use a level again to make sure it is straight. If needed, use wood shims to adjust the height. Secure it with screws just like the first one.
Connecting the Cabinets
After you hang all the cabinets, connect them. Use screws to attach them together. This helps the cabinets stay strong. Make sure they are flush against each other.
Adding the Doors
Now, it is time to add the doors back. Align the hinges with the pre-drilled holes. Use a screwdriver to attach the hinges. Make sure the doors open easily. Adjust them if they are not level.
Finishing Touches
After the doors are on, check everything again. Make sure all screws are tight. If you see any gaps, use wood shims to fill them. You can also paint or stain the cabinets if you want.
Tips for a Successful Installation
Here are some helpful tips:
- Always double-check your measurements.
- Take your time to find the studs.
- Get help from a friend if needed.
- Keep tools organized for easy access.
- Wear safety glasses while drilling.
Common Mistakes to Avoid
Sometimes, mistakes happen. Here are a few to avoid:
- Not using a level can cause crooked cabinets.
- Ignoring the weight limit can lead to falling cabinets.
- Not securing to studs can make cabinets unstable.
Frequently Asked Questions
How Do I Choose The Right Wall Cabinets For My Kitchen?
Choosing the right wall cabinets depends on your kitchen size, style, and storage needs. Measure your space and consider your design preferences.
What Tools Do I Need To Install Wall Cabinets?
You will need a stud finder, level, drill, screws, and a measuring tape. These tools help ensure a secure and accurate installation.
How High Should Wall Cabinets Be Installed?
Wall cabinets should be installed about 18 inches above the countertop. This height offers easy access while maximizing kitchen space.
Can I Install Wall Cabinets Alone?
Yes, you can install wall cabinets alone, but it’s easier with help. Having a friend can make lifting and positioning simpler.
Conclusion
Installing wall cabinets in your kitchen is a great project. It can give you more storage and improve your kitchen’s look. By following these steps, you can do it yourself. Remember to take your time and be careful. Happy building!