Crown moulding can make your kitchen look beautiful. It adds a nice touch to your cabinets. Installing crown moulding is not too hard. With some tools and steps, you can do it yourself.
What is Crown Moulding?
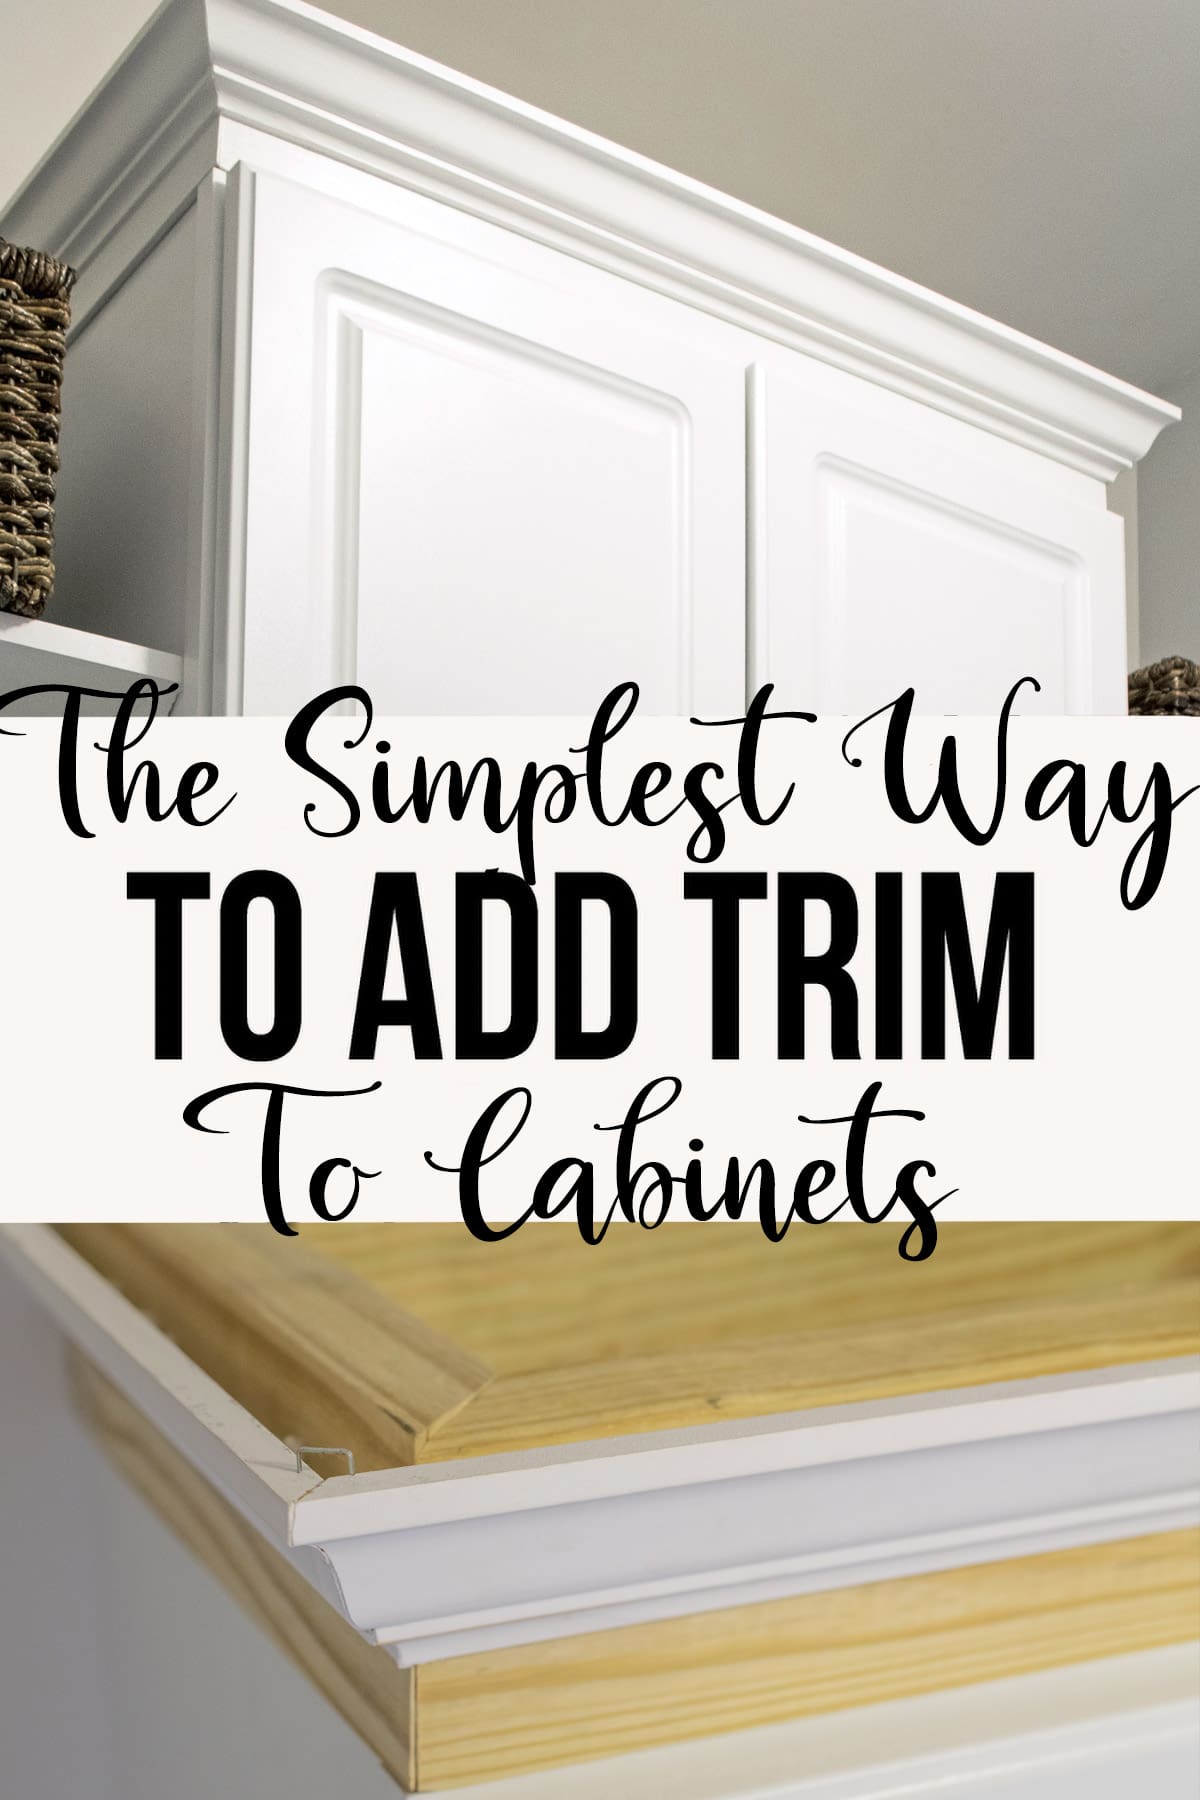
Crown moulding is a decorative piece. It goes at the top of cabinets. It hides the gap between cabinets and the wall. Crown moulding comes in many shapes and sizes. You can pick the one you like best.
Tools You Will Need
Before you start, gather your tools. Here is a list of what you need:
- Measuring tape
- Miter saw
- Brad nailer or hammer
- Wood glue
- Stud finder
- Pencil
- Level
- Caulk
- Paint or stain (optional)
Credit: www.cravingsomecreativity.com
Steps to Install Crown Moulding
Step 1: Measure Your Cabinets
First, measure the top of your cabinets. Use a measuring tape. Write down the lengths. This helps you know how much moulding you need.
Step 2: Choose Your Moulding
Go to a home improvement store. Look for crown moulding. Choose a design that fits your style. Check the size. Make sure it fits your cabinets.
Step 3: Cut The Moulding
Now, it’s time to cut the moulding. Use a miter saw for precise cuts. Cut the ends at a 45-degree angle. This helps the pieces fit together nicely. Cut one piece for each side of the cabinet.
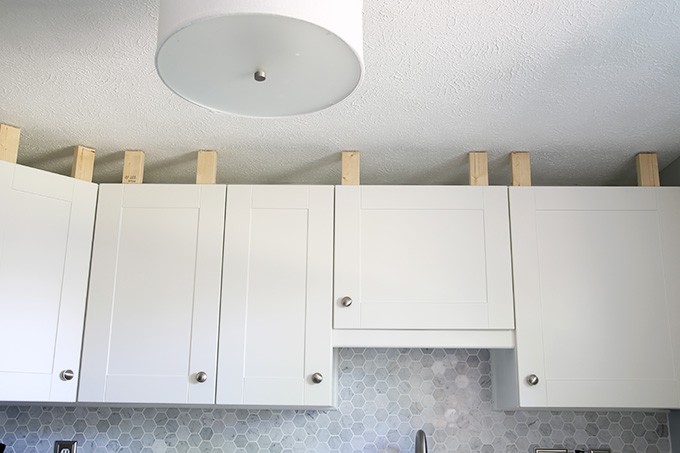
Step 4: Find The Studs
Use a stud finder. This helps you find the wooden beams in the wall. These beams are strong. You want to nail your moulding into these. Mark the location of each stud with a pencil.
Step 5: Dry Fit The Moulding
Before you attach it, do a dry fit. Place the moulding on top of the cabinets. Make sure it fits well. Adjust if needed. This helps you see how it will look.
Step 6: Attach The Moulding
Now, it’s time to attach the moulding. Apply wood glue on the back. Press it against the wall and the cabinet. Then, use a brad nailer or hammer. Nail it into the studs. This keeps it secure.
Step 7: Fill The Gaps
After you attach the moulding, check for gaps. Use caulk to fill these spaces. This gives a clean look. Smooth the caulk with your finger or a tool.
Step 8: Paint Or Stain
Once the caulk dries, you can paint or stain the moulding. Choose a color that matches your kitchen. Apply one or two coats. Let it dry completely.
Tips for a Great Finish
Here are some tips to help you:
- Work in a well-lit area.
- Take your time measuring.
- Wear safety glasses when cutting.
- Have a friend help you hold long pieces.
Common Mistakes to Avoid
Many people make mistakes when installing moulding. Here are some common ones:
- Not measuring correctly.
- Cutting at the wrong angle.
- Forgetting to find the studs.
- Rushing through the project.
Credit: justagirlandherblog.com
Frequently Asked Questions
How Do I Choose The Right Crown Moulding For My Kitchen?
Select crown moulding that matches your kitchen style. Look for materials like wood or MDF for durability.
What Tools Do I Need For Installing Crown Moulding?
You will need a miter saw, nail gun, measuring tape, and level. These tools make the job easier.
Can I Install Crown Moulding Without A Professional?
Yes, you can install it yourself. Follow guides and take your time for best results.
How Do I Measure For Crown Moulding?
Measure each wall’s length. Use a miter saw for accurate cuts. Don’t forget to add extra for mistakes!
Conclusion
Installing kitchen cabinet crown moulding can be fun. It adds beauty to your kitchen. Follow these steps carefully. With patience and practice, you can do it. Enjoy your new kitchen look!
FAQs
1. How Long Does It Take To Install Crown Moulding?
It usually takes a few hours. This depends on the size of your kitchen.
2. Can I Install Crown Moulding By Myself?
Yes, many people do it alone. Just follow the steps.
3. What If I Make A Mistake While Cutting?
Don’t worry! You can always cut a new piece. Measure again first.
4. Is Crown Moulding Hard To Remove?
Not really. You just need to pry it off carefully.
5. Do I Need Special Tools For This Project?
A miter saw and a brad nailer are helpful. But you can use a hammer too.