Installing a kitchen faucet can seem hard. But with the right steps, you can do it yourself. This guide will show you how. It is easy and fun. Let’s start!
What You Need
Before you start, gather your tools and materials. Here is a list of what you need:
- New kitchen faucet
- Adjustable wrench
- Screwdriver
- Plumber’s tape
- Bucket
- Rags or towels
- Pliers
- Safety goggles
Step 1: Turn Off the Water
First, turn off the water supply. Look under the sink. You will find two valves. One is for hot water. The other is for cold water. Turn both valves to the right to close them.
Step 2: Remove the Old Faucet
Next, remove the old faucet. Start by disconnecting the water lines. Use the adjustable wrench to loosen the nuts. These nuts are where the lines connect to the faucet. Be careful. Water may still be in the lines.
Place a bucket under the sink. This will catch any water that spills. Once the lines are off, remove the old faucet. There may be screws holding it in place. Use a screwdriver to take them out.
Step 3: Clean the Sink
Now, clean the area where the old faucet was. Remove any dirt or old plumber’s tape. A clean surface helps the new faucet fit better.
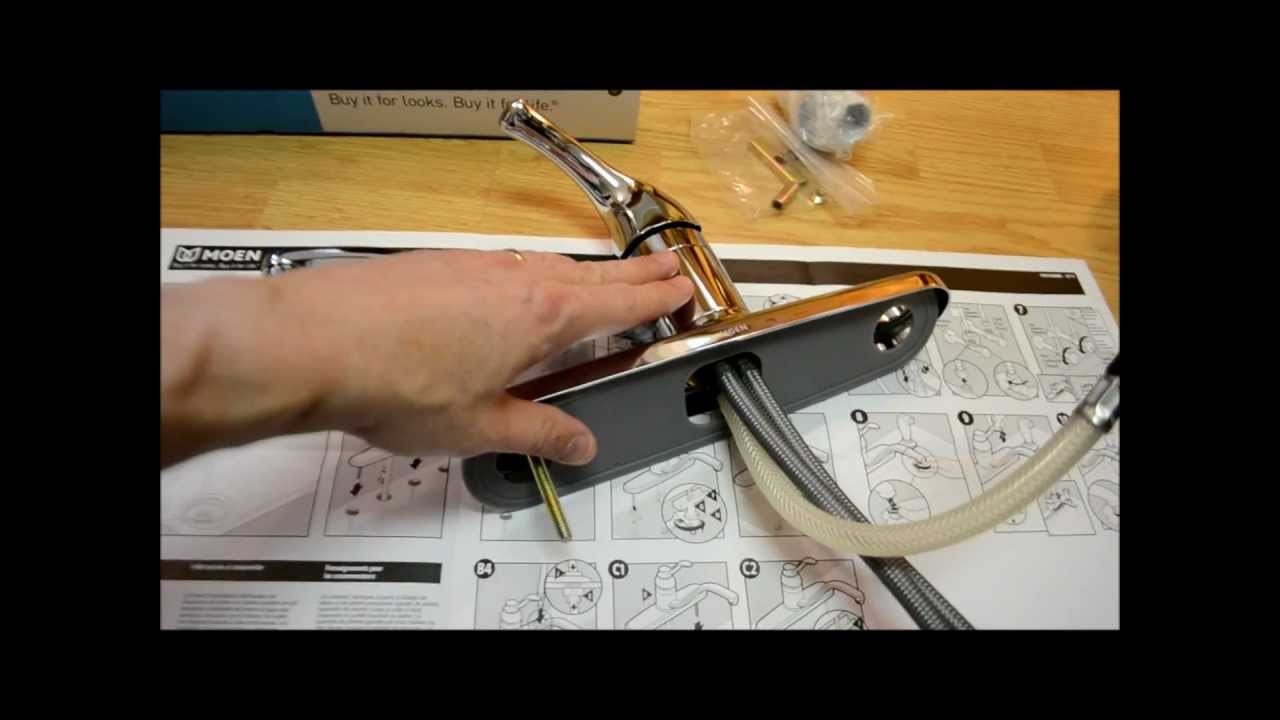
Step 4: Install the New Faucet
Take the new faucet out of the box. Read the instructions that come with it. Each faucet is a little different. Follow the steps in the manual.
Most faucets fit through a hole in the sink. Place the faucet in the hole. If your faucet has a plate, put it on first. Then, place the faucet on top.
Step 5: Secure the Faucet
Now, secure the faucet. There may be nuts or screws to tighten. Use your hand first. Then, use the wrench to make it snug. Do not over-tighten. This can break the faucet.
Credit: www.homedepot.com
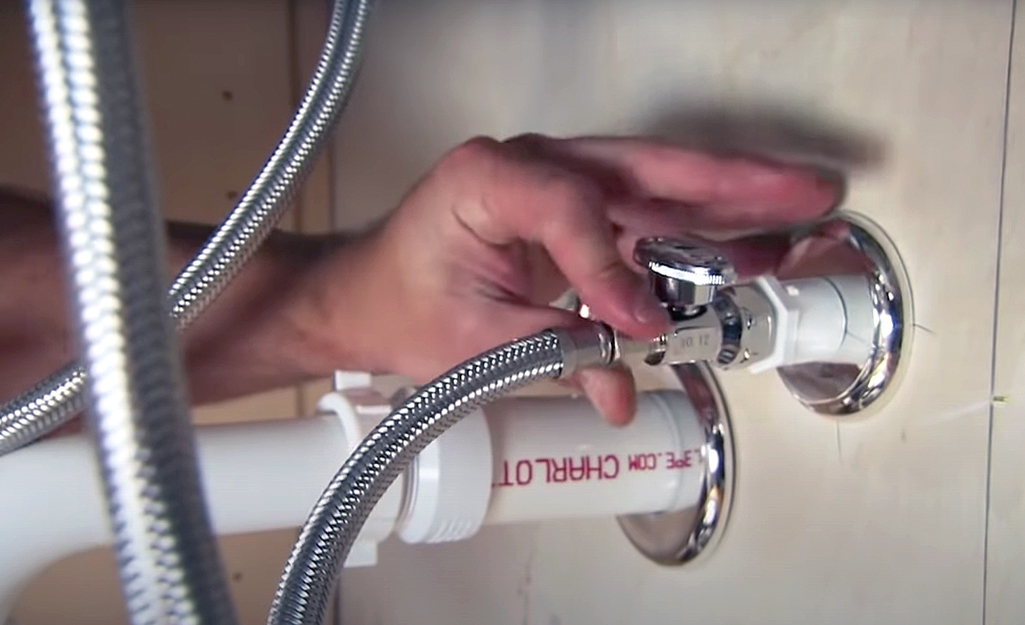
Step 6: Connect the Water Lines
Next, connect the water lines. Take the hot water line. It is usually red. Connect it to the hot side of the faucet. Tighten it with the wrench.
Now, take the cold water line. It is usually blue. Connect it to the cold side of the faucet. Again, tighten it with the wrench.
Step 7: Apply Plumber’s Tape
Before you finish, apply plumber’s tape. Wrap it around the threads of the water lines. This helps prevent leaks. Make sure to cover the threads well.
Step 8: Turn On the Water
Now, turn on the water supply. Go back under the sink. Turn both valves to the left. This opens the water supply.
Credit: www.youtube.com
Step 9: Check for Leaks
After turning on the water, check for leaks. Look where the lines connect to the faucet. If you see any water, turn off the water. Tighten the connections again.
Step 10: Test the Faucet
Once you fix any leaks, test the faucet. Turn on the hot and cold water. Make sure the water flows well. Check the spray pattern too. It should be strong and steady.
Step 11: Clean Up
Finally, clean up your workspace. Put away your tools and materials. Make sure to remove the bucket. Wipe any water spills with rags or towels.
Tips for Success
Here are some tips to help you:
- Read the faucet manual carefully.
- Take your time with each step.
- Ask a friend for help if needed.
- Wear safety goggles to protect your eyes.
Frequently Asked Questions
How Do I Choose The Right Kitchen Faucet?
Select a faucet that fits your kitchen style and needs. Consider features like height, spout reach, and finish.
What Tools Do I Need To Install A Kitchen Faucet?
You will need a basin wrench, adjustable wrench, plumber’s tape, and a screwdriver for the installation.
How Long Does It Take To Install A Kitchen Faucet?
Most people can install a kitchen faucet in about 1 to 2 hours. Time may vary based on experience.
Can I Install A Kitchen Faucet Myself?
Yes, many homeowners can install a faucet with basic tools and instructions. Follow the steps carefully.
Conclusion
Installing a kitchen faucet is not hard. With these steps, you can do it yourself. Remember to be careful and take your time. Soon, you will have a new faucet in your kitchen.
Enjoy your new faucet! It will make cooking and cleaning easier. If you have questions, feel free to ask a professional. Happy installing!