Antique mirror tiles can add beauty to your home. They have a classic look. Many people want this style. You can make your own antique mirror tiles. This guide will show you how. Let’s get started!
What is an Antique Mirror?
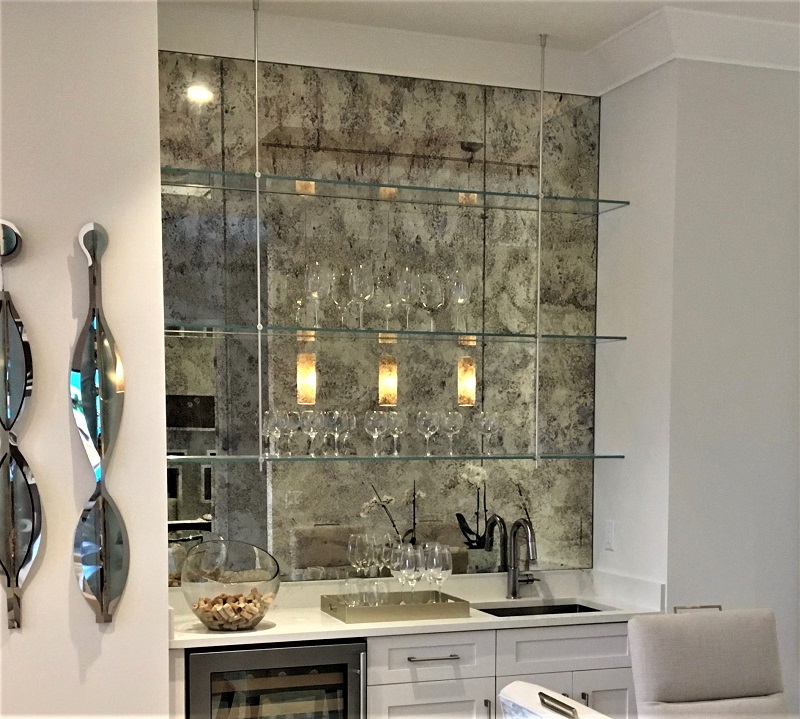
An antique mirror looks old and worn. It has a special charm. Many people love the vintage style. These mirrors can make a space feel warm. They also reflect light beautifully. You can use these mirrors in many places. They look great in living rooms, bathrooms, or hallways.
Materials You Will Need
Before you begin, gather your materials. Here is a list:
- Mirror tiles
- Spray adhesive
- Paint (black or brown)
- Glass cleaner
- Soft cloth
- Distilled water
- White vinegar
- Protective gloves
- Masking tape
- Paintbrush

Credit: www.etsy.com
Steps to Antique Mirror Tiles
Step 1: Clean The Mirror Tiles
Start by cleaning your mirror tiles. Use glass cleaner and a soft cloth. Make sure there is no dust or dirt. The surface must be clean. This helps the paint stick better.
Step 2: Prepare Your Work Area
Find a flat, safe space to work. Use a table or a large surface. Lay down some newspaper or a drop cloth. This will catch any mess. Make sure you have enough light.
Step 3: Protect The Edges
Use masking tape to protect the edges. Tape around the sides of each tile. This will keep the paint off the edges. It helps to make a clean look.
Step 4: Mix The Antiquing Solution
Now it’s time to make the antiquing solution. In a spray bottle, mix equal parts of distilled water and white vinegar. This will help create the antique effect.
Step 5: Spray The Mirror Tiles
Gently spray the solution on the back of the tiles. Do not soak them. Just a light mist is enough. Let it sit for a few minutes. This will create a mottled look.
Step 6: Apply The Paint
Now you can paint the back of the mirror tiles. Use black or brown paint. Use a paintbrush for this step. Apply the paint evenly. You can do one coat or two, depending on how dark you want it.
Step 7: Let The Paint Dry
After painting, let the tiles dry. This may take a few hours. Check the paint for dryness before moving on.
Step 8: Remove The Tape
Once the paint is dry, carefully remove the masking tape. Take your time. You want to avoid peeling any paint off the tiles. This will give you a neat edge.
Step 9: Add A Distressed Look (optional)
If you want a more aged look, you can distress the paint. Use sandpaper to lightly rub the edges. This gives a worn effect. Be gentle so you do not remove too much paint.
Step 10: Clean Up
After you finish, clean your area. Throw away any used materials. Wash your brushes and tools. You want everything to be tidy.
Credit: muller-designs.com
Where to Use Antique Mirror Tiles
Antique mirror tiles can be used in many ways. Here are some ideas:
- Accent walls in living rooms
- Backsplashes in kitchens
- Decorative pieces in bathrooms
- Framed art in hallways
- Furniture accents, like tabletops
Tips for Best Results
Here are some tips to help you:
- Choose the right paint color.
- Test the antiquing solution first.
- Work in a well-ventilated area.
- Wear protective gloves when painting.
- Take your time for better results.
Frequently Asked Questions
How Do You Make Antique Mirror Tiles?
To make antique mirror tiles, apply a special paint or solution to the back of the mirror. This creates a vintage look.
What Materials Are Needed For Antique Mirror Tiles?
You will need mirror tiles, paint, a spray bottle, and protective gloves.
Can You Use Any Type Of Mirror For This Project?
Yes, any flat mirror can be used. Ensure it is clean and free from damage.
How Long Does The Antique Mirror Process Take?
The process usually takes a few hours. Drying time can vary depending on the product used.
Conclusion
Creating antique mirror tiles is a fun project. It lets you add a special touch to your home. Follow the steps carefully. Gather your materials and take your time. Soon, you will have beautiful antique mirror tiles. Enjoy your new decor!