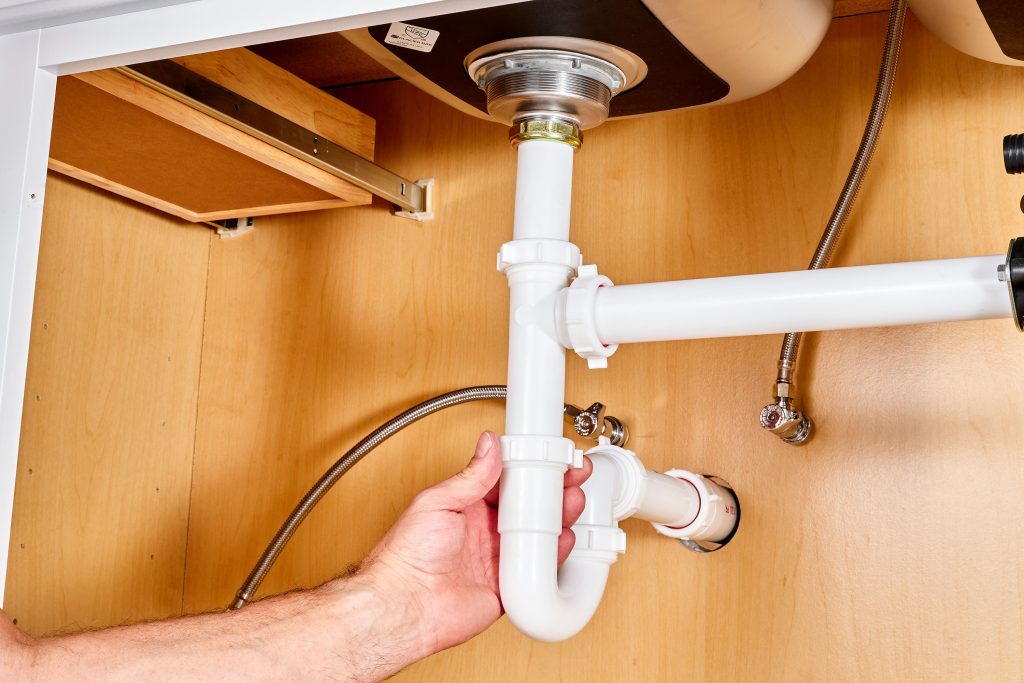
Installing a kitchen sink drain pipe is easy. You do not need to be a plumber. With some tools and patience, you can do it yourself. This guide will help you step by step. Let’s get started!
Tools You Will Need
Before you begin, gather the tools. Here is a list:
- Adjustable wrench
- Pipe wrench
- Bucket
- PVC pipe cutter
- Tape measure
- Plumber’s tape
- Putty knife
:max_bytes(150000):strip_icc()/how-to-install-a-sink-drain-2718789_hero_5078-64538f6f90d545c7af0728e4bf8f894e.jpg)
Credit: www.thespruce.com
Parts You Will Need
You also need some parts. These parts are important for the drain system. Here is what you need:
- Drain pipe
- Trap
- P-trap adapter
- Slip nuts
- Washers
Step 1: Prepare the Area
First, make sure the area is clean. Remove any items under the sink. This makes it easier to work. Place a bucket under the sink. This will catch any water. It is important to prevent mess.
Step 2: Remove the Old Drain Pipe
If there is an old drain pipe, you need to remove it. Use the adjustable wrench to loosen the slip nuts. Turn them counterclockwise. Be careful. Some water may spill. Let it drain into the bucket.
Step 3: Measure the New Pipe
Take your tape measure. Measure the distance from the sink to the drain. Cut the new drain pipe to this length. Use the PVC pipe cutter for a clean cut. Always check your measurements twice.
Step 4: Install the New Drain Pipe
Now, it is time to install the new pipe. Take the new drain pipe. Insert one end into the sink. Use plumber’s tape on the threads. This helps create a good seal. Tighten the slip nut by hand. Then use the wrench for a snug fit.
Step 5: Add the P-Trap
The P-trap is very important. It keeps odors from coming back. Take the P-trap and connect it to the drain pipe. Use slip nuts to secure it. Make sure the trap is level. This helps water flow smoothly.

Credit: www.thisoldhouse.com
Step 6: Connect the Trap to the Drain
Now, connect the other end of the trap to the drain. Again, use slip nuts and washers. Check that everything is tight but not too tight. This will help prevent leaks.
Step 7: Check for Leaks
It is time to check for leaks. Turn on the faucet slowly. Watch the connections closely. If you see any water, tighten the nuts a bit more. Sometimes it takes a little adjusting.
Step 8: Clean Up
After everything is installed, clean up the area. Remove the bucket and any tools. Put back the items you took out. Make sure everything looks nice and tidy.
Tips for Success
Here are some tips to help you:
- Always wear gloves to keep your hands clean.
- Keep a towel handy for spills.
- Do not rush. Take your time with each step.
- Ask for help if you feel unsure.
Common Mistakes to Avoid
Be aware of some common mistakes:
- Not using plumber’s tape can cause leaks.
- Over-tightening can break the pipes.
- Forgetting to check for leaks is a big mistake.
Frequently Asked Questions
How Do I Choose The Right Drain Pipe Size?
Choose a drain pipe size that matches your sink’s outlet. Standard sizes are usually 1. 5 or 2 inches in diameter.
What Tools Do I Need To Install A Drain Pipe?
You’ll need a pipe wrench, plumber’s tape, and a bucket for any spills. A hacksaw may help if you need to cut pipes.
Can I Install A Kitchen Sink Drain Myself?
Yes, you can install it yourself with basic tools and instructions. Just follow each step carefully for best results.
What Are Common Mistakes When Installing Drain Pipes?
Common mistakes include misaligning pipes and not using enough plumber’s tape. Both can cause leaks.
Conclusion
Installing a kitchen sink drain pipe is simple. With the right tools and parts, you can do it. Just follow these steps carefully. Remember to take your time. Soon, you will have a working sink again.
Good luck with your project. You can do this!


